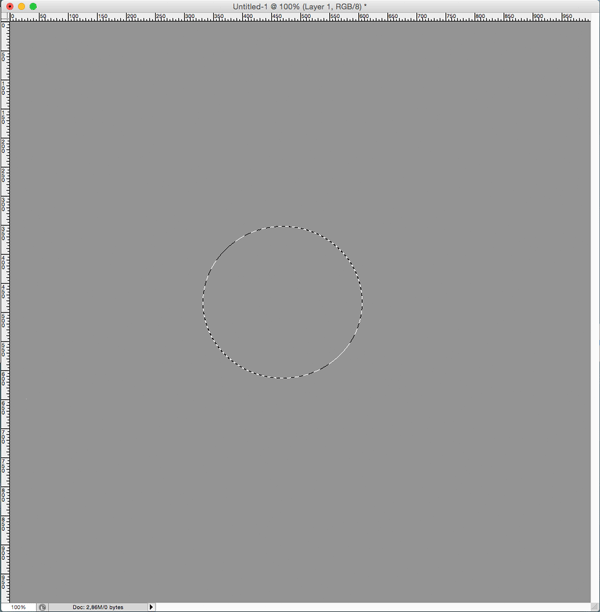
- Create a new composition 1000x1000.
(Fire and Smoke effects are depend on picture size. On different images with different resolution effects may look different. To reproduce this tutorial exactly, it is better to use exactly image sizes. When you will become a master of AlphaPlugins FireFor then you can understand how to work with its parameters and how to apply it on images with any sizes) - Fill image with gray color - Make a circular selection. (Selection can be arbitrary. Now we will use a circular selection just as a simplest example. In future, you can use selection in any shape, by any contours, texts and etc. Such as you can use as a source of fire any custom vector paths)- Go to Photoshop's menu "Filter->Alpha Plugins->FireFor...". The FireFor dialogue window will be shown.
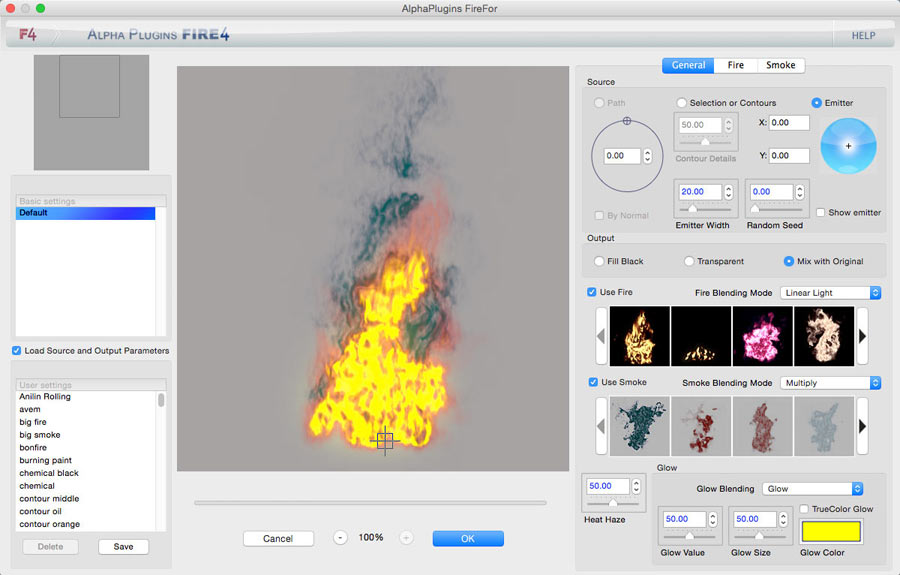
(if you havent yet register it then you can use it several days as a trial version. To register the plug-in read this instruction)- You can resize dialogue window and shift preview window by mouse.
- Press "Default" item in "Basic Presets" list. This step will return all settings as default. If you already applied filter then it keeps latest applied settings.
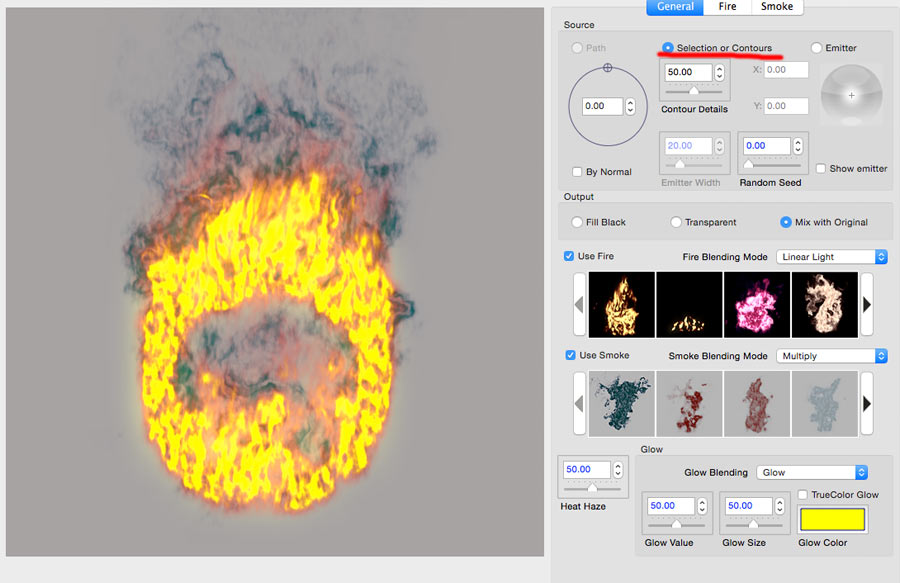
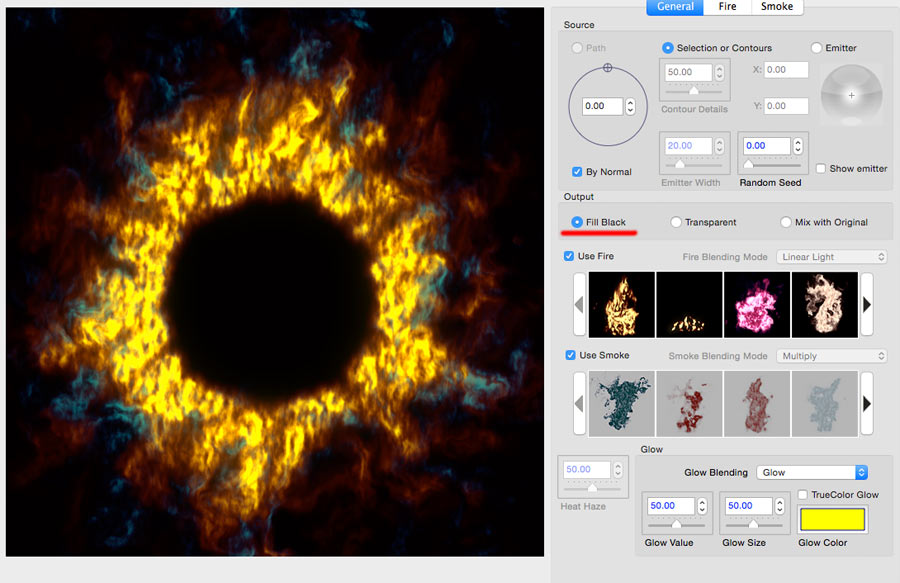
- In the "General Tab" in "Source" group click the "Selection and Contours" radio button. Now the fire will burn on a contour of selection. In follow, you can experiment with other types of fire's sources by contours, by paths or explicit emitter.
- Check the "By Normal" checkbox. Now the fire burns perpendicularly to source contour. You can adjust a direction of flame with help of wheel control.
- Now you can play with different output modes. In the
"Output" group choose the
"Fill Black" radio button. Now the effect will be applied on a black background. As variant, you can apply it on a transparent (if source has a transparent channel) background for following mixing in Photoshop, or blend it with source image by using build-in blending modes.
We will experiment with fire's settings. Then, temporary for clearance we will switch off parameters which arent needed now.
- Switch Off "Use Smoke" checkbox. And setup
"Glow Value" as 0.
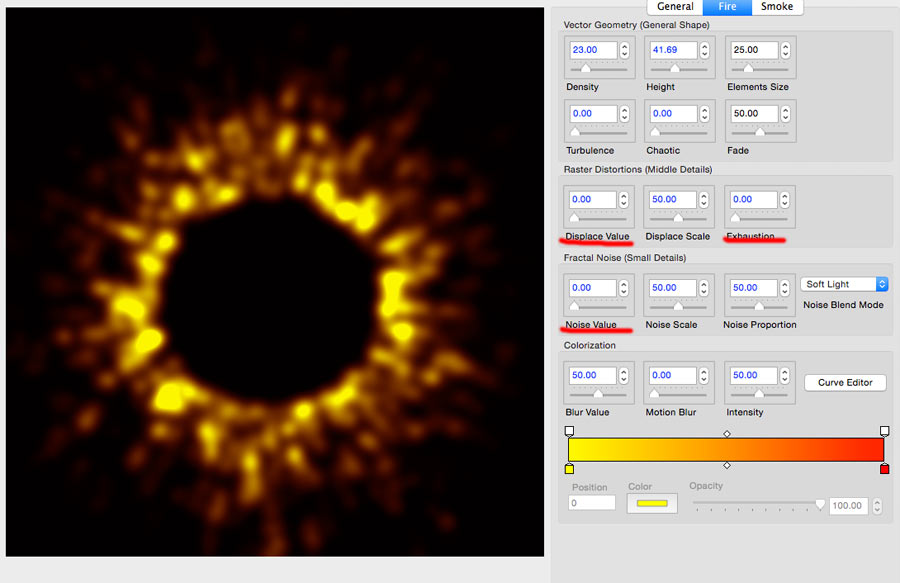
- Go to the "Fire" tab.- In the group "Fractal Noise (Small Details)" set "Noise Value" as 0. (to remove small fires details)
- In group "Raster Distortion (Middle Details)" set "Displace Value" as 0 and "Exhaustion" as 0.
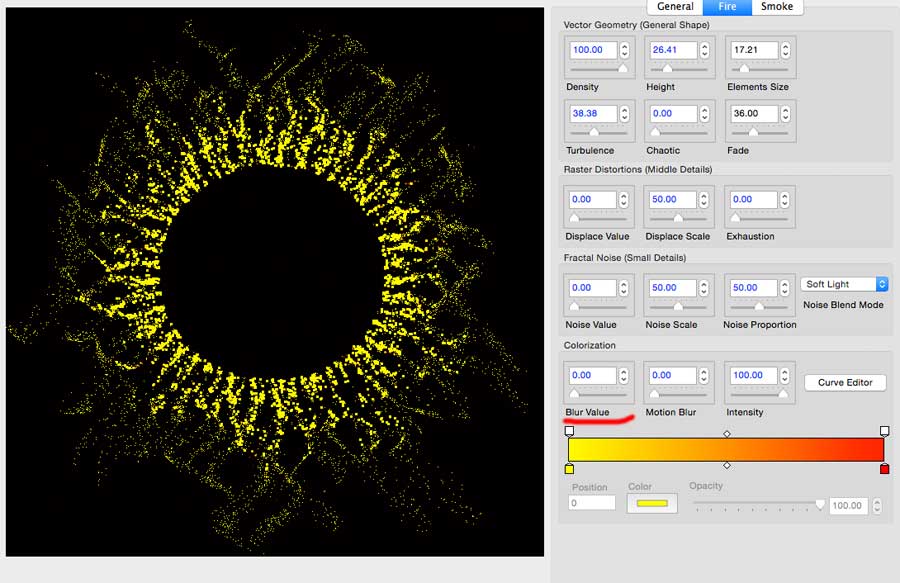
Now our flame is generated only with using a particles system. And we will modify parameters response for general geometric shape.
- You can play with particle system parameters in the group
"Vector Geometry (General Shape)"- In additionally, you can experiment with parameters
"Blur Value" and
"Intensity" in the
"Colorization" group.
It lets to understand better how particles system parameters work. Even you can setup the
"Blur Value" as 0 and you will see exactly only particles elements
and obviously watch a real effects from particles parameters changes.
- When you will finish to adjust a general shape of flame then you can return the
"Blur Value" as non zero and have the picture looks little more as a fire.
Experiment with particles system parameters and tune up the blurred particles system parameters for suit your tastes.

An advise. You can quick return any parameter to default state if you just double click on its controller.
- Now we are ready to setup a middle level of flame details.
- Look at the "Raster Distortions (Middle Details)" group and increase the "Displace Value" parameter. You can see as an effect
of turbulence displace is applied on the fire. You can additionally experiment with
"Displace Scale" and
"Exhaustion" parameters of
turbulence displace.
It is very quick working and power tool what lets to make fire's effect realistic.
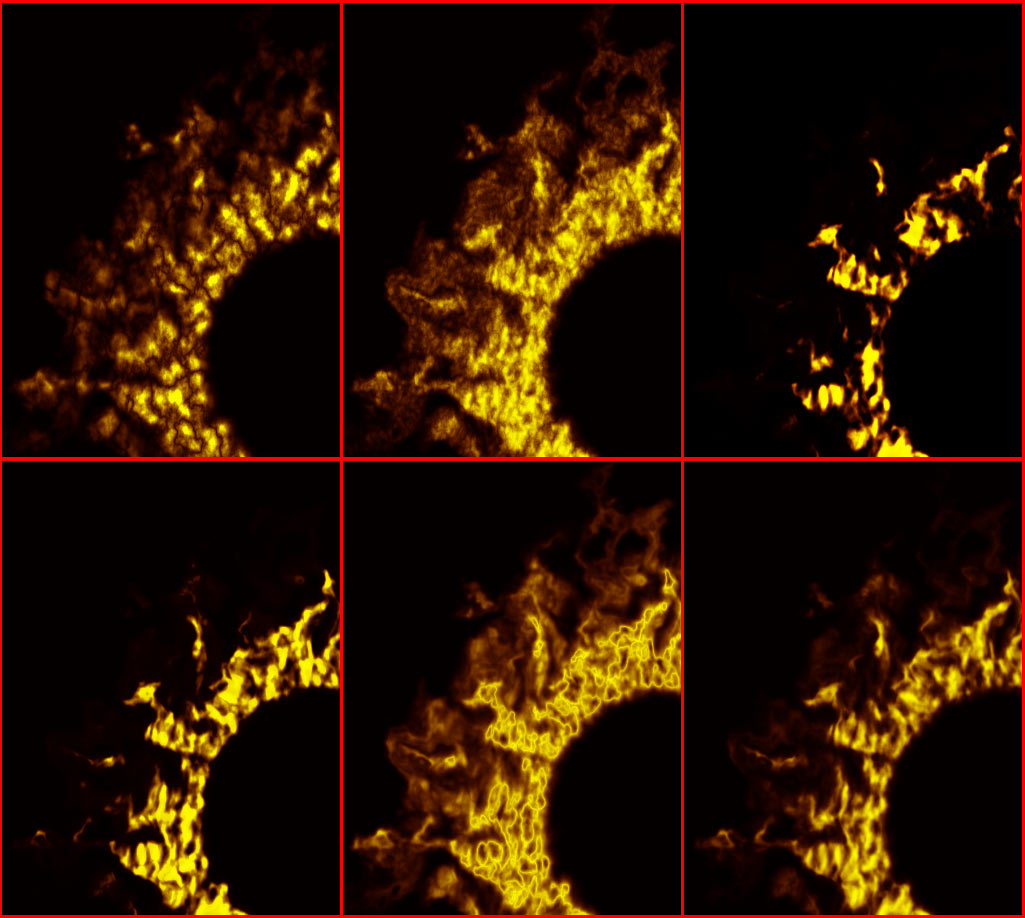
Next step. We will play with adjusting small flame details.
- Look at the group of parameters
"Fractal Noise (Small Details)".
- Set the "Noise Value" as not 0. Play with parameters
"Noise Scale" and
"Noise Proportion".
- At right side of dialog you can see the dropdown list
"Noise Blend Mode". Here you can define how fractal noise will be mix with flame. On illustration you can see several samples of different noise blending modes.
- In bottom of the
"Fire" tab there is
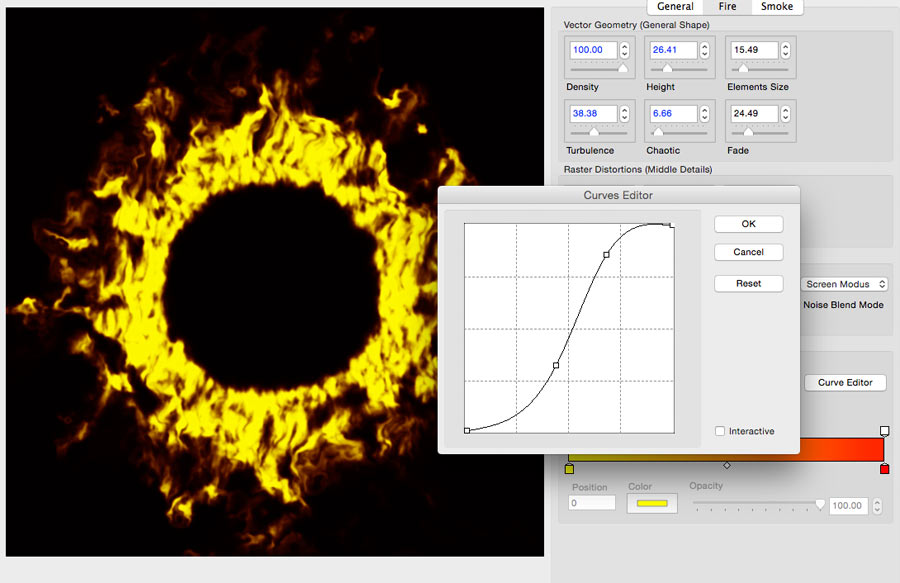
"Colorization" group. Here you can make a final make-up for your fire.
Look at the
"Curve Editor" button. It launches a curve editor what lets to adjust flame's contrast and intensity. It allows make flame more sharpen or more blurred.
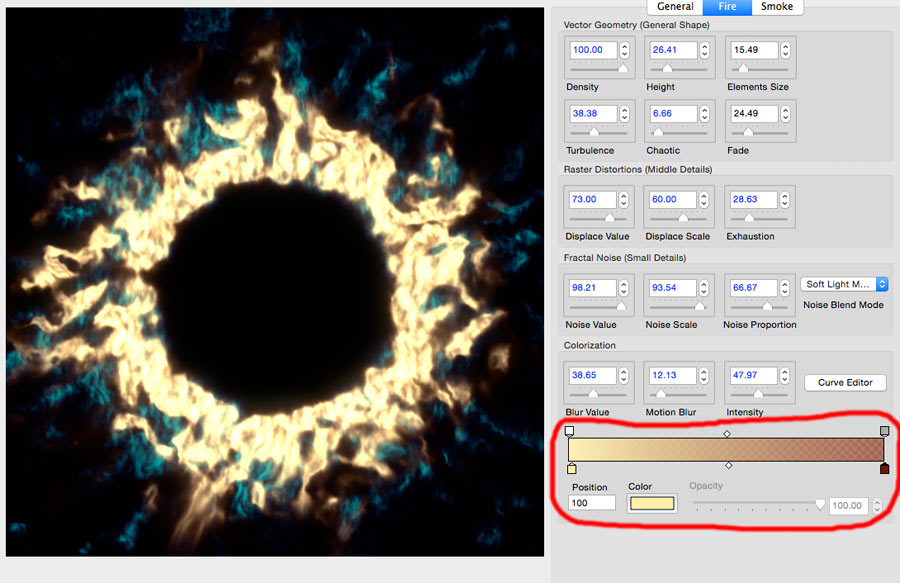
- Look at other parameters in this group.-
"Blur Value" and
"Motion Blur" you already know. Lets see on a color gradient controller bellow.
This control lets to modify flame colors. The work with this controller is similar like with a standard Photoshop gradient controller.
You can add color and transparency marks. And move and delete these.
- We are close to finish. If you feel what flame is as you need then you can switch on smoke and add glow as a final touch.
- What if we want to make the fire animated? It is simple.- On the
"General" tab there is a controller
"Random Seed". Except what this parameter defines initial states of random generators,
this defines a phase of flame in time. Just increase this parameter and generate serial frames of flame
BWT. This tutorial is not devoted animated fires. This animated picture is placed here as an optional illustration. If you want to study how to use
the
AlphaPlugins FireFor for animation fire creation then you should look at this
advanced tutorial. 
 iOS Apps