| AlphaStar tutorial for After Effects. |
|
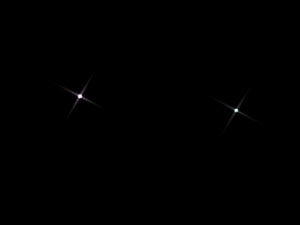
Wizard wand from a chopstick.This tutorial tells to you how to create very interesting and amazing special effect then the tail consisting from myriads of fairy stars, appears after a magic wand movement. You will have studied how to create particle system of lightings elements and how to decorate your video with fantastically beautiful dynamic stars and sparks. For reproduce this tutorial you should have installed an additional plug-in module "AlphaStar - Starsfall". You can find the latest version of this product here. Preliminary steps.1. Take a video with junior wizard. It he hasn't his magic wand then you can use any another stick instead. 2. Import the video source in your "After Effects" composition (Ctrl+I). 3. Now you should use an additional plug-in module "AlphaStar - Starsfall". You should have this plug-in already established on your computer. Now go to menu "Effect/AlphaPlugins" and apply the effect "AlphaStar - Starsfall". 4. You will see a black screen with several bright stars. Don't hesitance, now we will adjust plug-ins parameters.  | |  | | 
Pic.2. The default screen of plu-ins | |  | |  |
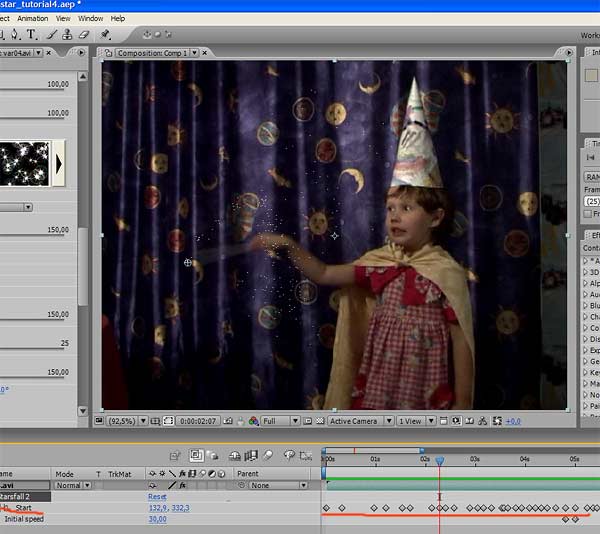
Stars source adjusting.1. Go to the first frame of your composition. 2. Go to in "Effect Control" window and find "AlphaStar-Starsfall" plug-in. Go to in list of parameters "Geometry" and find the dropdown list box "Type". Select the item "Dots" in this list. Now the stars particles will be drawn as dots. It allows to increase a speed of work during a movement parameters adjusting. 3. Go to in end of parameters list and find the dropdown list "Mix with original". Set this parameter as "Add". Now you can see that particles are added upon original video. Indeed you can use this parameter in "Replace" mode and use standard After Effects blending tools for layer mixing. 4. Go to "Emitter" list of parameters. Find the dropdown list "Standard path" and select in this the item "Point". 5. Look at "Control points" sublist. You can see than only one point is available. This point set a place where particles will be born. You should move this point along of trajectory of magic wand nib movement. 6. Go to first frame. Make the parameters "Start point" animated. Seek forward your composition and make keys for this parameter where they are needed.  | |  | | 
Pic.3. Animate "Start point" parameter. | |  | |  |
7. Now we should just correct particles emitter. Find the dropdown list "Orientation" and set it as "Random all directions". 8. Decrease the parameter "Initial speed", for example, as 30. 9. You can make particles movement more interesting if you add some additional oscillations. Find the dropdown list "Oscillation" and select it as "Round", for example. Increase "Amplitude" and "Frequency" of oscillation for better effect. Now you have a source of lighting particles and you should adjust magic stars appearance. Appearance and color adjustment.Now it is time for adjusting the appearance of our stars. Our plug-in has beautiful tools for quick parameters adjusting. The special Presets mechanism can make your work with our effect easier and productivity.  Pic.4 Pic.4. Parameters presets buttons. You can see a set of buttons with pictures. Just click on any button and plug-in parameters will be changed for reproduce results as it is presented on button's pictures. If you want then you can use a preset as it is or you can take a preset as a base and make little adjusting for few parameters. Or, if you want, you can fully adjust all stars' parameters as you need manually.  | |  | | 
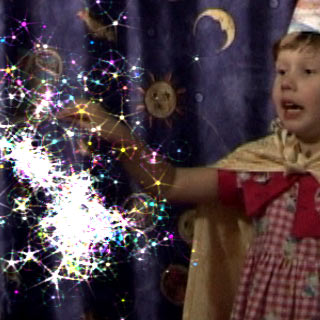
Pic.5. Sample of stars appearance. | |  | |  |
1. Go to in first frame of your composition 2. Go to in "Geometry" sublist of parameters and set "Type" dropdown, for example, as "Type 1". 3. Adjust "Size", "Width" and "Rays count" of stars as you want. 4. Go to "Color" sublist of parameters. Set "Value" parameter for adjust brightness of your particles. 5. And we have one last step. Find the parameter "Color dispersion" and set it as 100. Now our particles will be automatically colored in different colors. Now you almost finish this tutorial. You can self modify other parameters for more accurate adjusting of your fairy stars appearance. * * * In this tutorial you study how to create a particle system consisted from fairy stars and how to add this particle system on nib of sorcerer magic want. See avi with beautiful faity sprite that was created with help of this tutorial.
 | |  |
| See also | |
| |  | In this lesson you will study how to add beautiful moving stars on edges of any opaque object, like text, typing, subscribe, logo, silhouette or something like it. Also you will be familiarized how to adjust basic parameters of AlphaStar - Starsfall plug-in and you will understand the main idea how to use them and which parameters are responsible for what effects. |
| In this tutorial you study how to create very interesting and popular effect like rays which are lighting at the back of text, typing, silhouette or any another object. You can animate the source of light movement and receive very impressive effect with dynamical rays. |
| |  | |  |
|  | |  | | You can download the freshest release of AlphaStar plug-ins bundle for After Effects here | |  | |  |
|
|