 | |  |
AlphaPlugins Digitalizer II plug-in for Adobe Photoshop | |  | |  | |
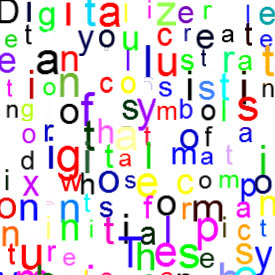
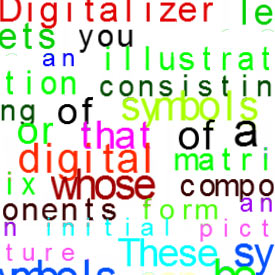
IntroductionWelcome to Digitalizer II - the new version of our famous Photoshop plug-in. Indeed the Digitalizer II is the fully new and power effects machine that lets you add in your composition textual effects with Āprofessional quality Digitalizer II allows to represent a picture as a set of symbols or digits or even as a meaningful text and this text appearance, places, sizes, colors and other attributes Ādepending on the initial picture. The used set of symbols or connected text can be easily edited in the build-in text editor and exported/imported as RTF file if needed. Digitalizer II can Āmanage many parameters of text compositions and you can easily setup all kinds of textual patterns, freely manipulate with text colors, sizes, fonts and features depending on the initial picture and random. Digitalizer II can construct fantastic 3D multilayer text compositions and adjust their parameters. Also Digitalizer II contains many built-in additional effects which are organically integrated with main textual effects. Digitalizer II has a convenient user interface with scalable and re-sizable previews and many adjustable parameters grouped into several tabbeds. Digitalizer II contains a large number of predefined presets of parameters which let you quickly explore plug-ins possibilities. And of course you can save self parameters presets if you need to as well as action scripts. Let's get started!If you haven't yet installed and activated Digitalizer II, click here!
If you've already installed Digitalizer II when click here to look at the User Interface. | |
Contents |
| |  | |  |
 | |  |
| Installation and Registration | |
| |
 Windows Installation. Windows Installation.
The installation of Digitalizer II is very easy.
- Download Digitalizer2Psd.exe from here.
- Launch this file and follow instructions.
- During installation the installer will attempt to automatically detect all installed versions of Photoshop, and will offer a variant of target path. If you have a version of Photoshop Creative Cloud then you can install plug-in into a common pug-ins folder:
C:\Program Files\Common Files\Adobe\Plug-Ins\CC
In this case, you should not reinstall plug-in if you will install future Photoshop's versions. Else, you always can install plug-in into a local plug-ins folder i.e.:
C:\Program Files\Adobe\Adobe Photoshop CC2018\Plug-ins.
.
- Press Next button and complete the installation.
 To install plug-in in another non Photoshop editor, simply refer to the installation section of the user manual of this editor. To install plug-in in another non Photoshop editor, simply refer to the installation section of the user manual of this editor.
|
 Macintosh Installation. Macintosh Installation.
To install the Digitalizer II plug-in for Macintosh, our smart installer will locate the correct installation path for you easily and automatically - Download a Digitalizer2Installer.zip from here.
- Unzip it.
 Please, check what Digitalizer2Installer application is not readonly and what you have rights to install applications on this Mac. Please, check what Digitalizer2Installer application is not readonly and what you have rights to install applications on this Mac.- Launch Digitalizer2Installer application and follow instructions.
- The plug-in finds all installed versions of Photoshop. You should choose one. If you have a version of Photoshop Creative Cloud then you can install plug-in into a common
plug-ins folder:
/Library/Application Support/Adobe/Plug-Ins/CC
In this case, the plug-in will be available for all versions of Photoshop CC include future.
As variant you can install plug-in into a local plug-ins folder i.e.:
/Application/Adobe Photoshop CC2018/Plug-ins
or you can press "Custom" button and browse any other appropriate folder of your choice.
- Click "Next" button and all necessary files will be copied in chosen folder.
To install plug-in in Adobe Photoshop Elements, locate the plug-in folder specifically for this editor. |
Registration After purchasing you will automatically receive a registration number. You should register Digitalizer II plug-in. There are two ways how to register plug-in: Online and Offline. Online Registration. If you are connected to Internet then the Online registration is simplest way of registration. After launch Digitalizer II you will see a registration dialog. Just select Online radio button. Insert Your Name and given serial number and press Register button. Plug-in will connect to our registration server to complete your registration. If registration is successful then you will see a confirmatory message. Just press Close button. Registration is completed. If you have a firewall then I recommend to switch of it temporary during registration.
Offline Registration. If you have not Internet connection then you can register plug-in offline. Contact to us to obtain an offline answer for offline registration. The Offline Registration Number is a numerical ID that is valid during few days. In registration dialog just select Offline radio button.
Insert You Name, Serial Number and Offline Answer and press Register button to complete the registration. | Remember. You can register only so number of plug-in instances as you purchased. But I let a small number of additional registrations and you can i.e. install plug-in on your desktop and notebook. |
|
 |
You can use Digitalizer II plug-in not only into Adobe Photoshop. But also you can launch this (and many other) plug-in under other graphical application which dont support Adobe Photoshop plug-ins. Even you can havent Photoshop on your computer. With help of our utility AlphaPlugins LaunchBox you can launch Photoshop plug-ins (include Digitalizer II) under so applications like Adobe LightRoom, iPhoto, Aperture and many similar. |
| |  | |  |
| | |
| User Interface | |
| |
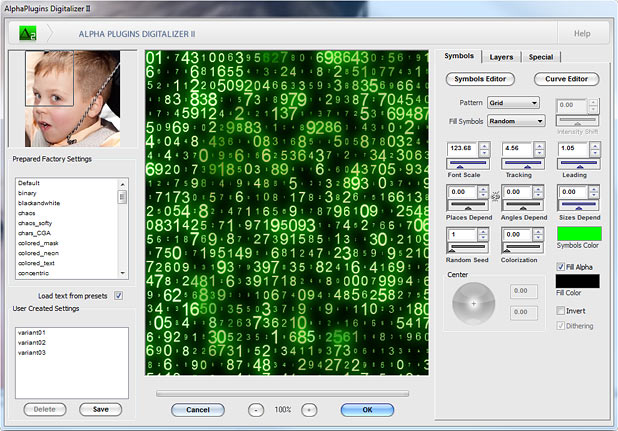 | Digitalizer II contains several tabbed sections of the user interface to create and fine-tune different textual effects. After successful plug-in installation load any picture into Adobe Photoshop and launch the Digitalizer II plug-in from the following menu location: Filter->AlphaPlugins->Digitalizer II... When you launch the plug-in, you'll see four tabbed sections on the upper left side of the GUI and a preview area on the right. Under the preview area there are zoom controls, OK and Cancel buttons. Once you've adjusted the controls and the result satisfies you then just click the OK button to apply the Digitalizer II effect to your image or click Cancel to close the plug-in UI and leave the image unchanged. You can re-size plug-in UI dialog if you wish. Just pull the bottom right corner to change the size of the plug-in dialog. And accordingly the preview area Āwill also be re-sized. Please remember that a bigger size preview requires more time for rendering.
Left panelWhen Digitalizer II is launched then at left side you always see a panel. Here you can load or save parameters presets which you stored before and were made by us. Prepared Factory Settings list ¢ this list box contains basic presets which we prepared for you and which helps you easily Āstudy plug-in possibilities or these presets can be used as a suitable template for a quick beginning and follow tuning User Settings list¢ this list box allows you to save or load settings which you made self. If you would like to save a parameters combination just click the Save button, put a setting name and click OK to save this setting. To load a setting, simply click on the setting name in the list. To delete a setting, just click its name in the list and push the Delete button. |
Symbols Tab At this page you can tune-up main parameters of textual effects. |
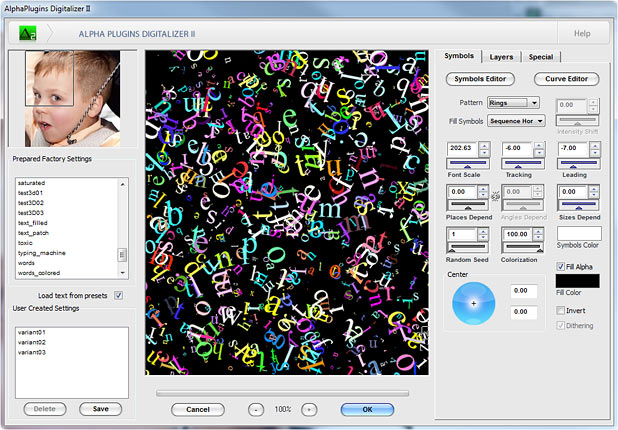
Pattern ¢ In this list you can set a distribution law how symbols will cover an initial picture. The follow options are available:  | Grid ¢ Symbols are placed as elements of a square matrix |  | 0xFF ¢ Symbols are placed as a grid but elements are grouped in pairs like a binary computer dump. (The space between groups should be enough to see the effect) | 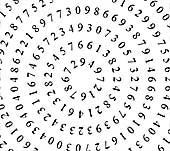 | Rings ¢ symbols or text are placed on concentric rings | 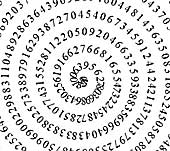 | Helix ¢ symbols are drawn in the shape of helix. | 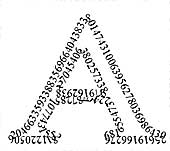 | Contours ¢ the initial picture will be vectorized and symbols will be placed along the main contours. If the initial picture has a selected area (Photoshop selection tool) then the contours(s) will be built by this selection. |
Intensity Shift ¢ this slider is available when the Adopted item is chosen for Fill Symbols dropdown list. With the help of this parameter you can fine-tune how symbols will represent an initial picture. Font Scale ¢ setups general symbols size. Tracking ¢ adjusts a distance between symbols by horizontal in case of Grid pattern. Or distance between adjacent symbols in cases of Rings or Helix patterns. In case of Contours this parameter defines a way how the picture will be vectorized or it will disable in case if contours are built by selection.Leading ¢ sets a distances between lines in case of Grid pattern or distances between rings and spiral windings in case of Rings and Helix patterns. In case of Contours pattern this parameter responses for distances between neighboring symbols in contour curves. Places Depend, Angles Depend and Sized Depend ¢ these parameters determine how symbols characteristics will depend on the initial picture's brightness. Random seed ¢ initial value of random generator. Colorization ¢ defines how symbols colors will depend on initial picture colors and how from a given color. Symbols Color ¢ the given color used with Colorization slider to define symbols colors. Center ¢ defines center of Rings and Helix patterns.
|
|
|
|
|
| | You can directly setup the Center parameter in a preview area if you were to drag the cross hair icon on preview area with holding right mouse button. |
|
|
|
|
|
|
| Symbol Edit ¢ this button can launch a small build-in text editor where you can edit used symbols set or used texts. Digitalizer II can use as separated symbols and digits to represent picture and the story text. In this editor you can edit a used text or load a text from RTF file or paste from clipboard. 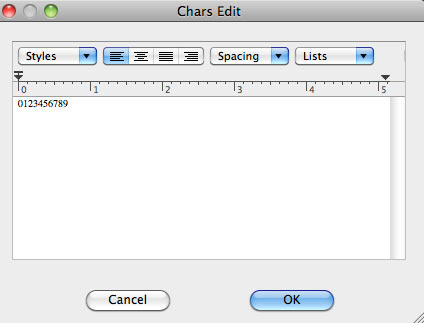
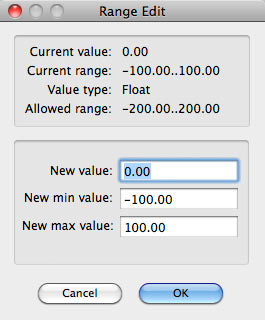
Curve Editor ¢ this button can launch a small curve editor build-in dialog. This dialog lets you adjust source image range inside the plug-in. This adjusted range will affect on how pictures will be represented with text. The usage of curve editor is the same like a similar standard Photoshop's curve editor. 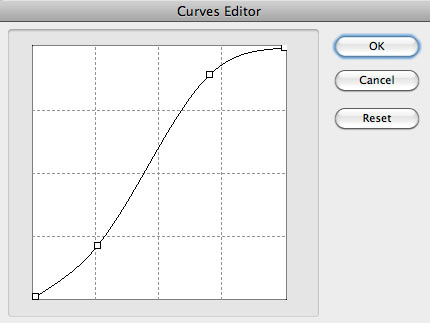
Fill Symbols ¢ this dropdown defines an order how symbols will be filled into a chosen pattern: 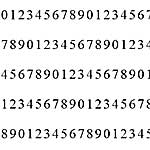 | Sequence Hor., Sequence Ver. - in case of Grid pattern the symbols from initial text will be typed from top to bottom Āor from left to right. In the case of Rings and Helix patterns these symbols will be repeated or from center to edges or along the rings/helix. In case of Contours pattern the symbols will be repeated or along the contours or as one symbol for one contour | 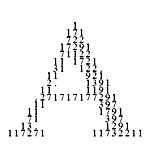 | Adopted ¢ the symbols will be placed depending on the original picture's intensity so that a text picture represents the original picture maximal close as Āpossible |  | Randomly ¢ symbols from given text are inserted in a pattern randomly. |
|
|
|
|
|
You can see that some sliders have blue colored elements and some sliders are gray colored. What is the difference? The gray colored sliders have fixed range as it is present. But Āthe range of blue colored sliders can be changed. Just press right mouse button on blue colored elements and some dialog will be shown where you can change a range of sliders value if the default range is not enough for you. 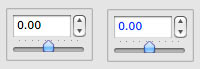
|  |
|
|
|
|
|
|
Fill Alpha ¢ defines to fill the empty space between symbols with Fill Color or to left as transparent if it is possible. Fill Color ¢ the color for filling space between symbols. Invert ¢ inverts intensity of initial picture Dithering ¢ switch on/off the spread of representation mistakes in case Fill Symbols is chosen as Adopt. It lets you avoid posterized fields consist from equal symbols. |
Layers Tab The parameters grouped into this tab let to create 3D textual effects. Digitalizer II allows create multilayer composition with a deep and perspective. Also, composition can have focus and fading effects. |
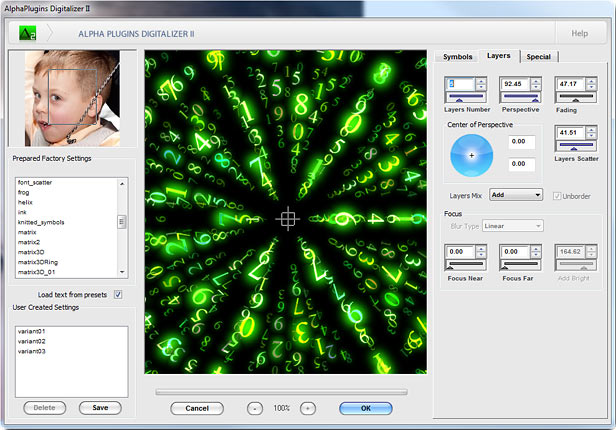 Focus ¢ this group of parameters lets you add in composition different kinds of focus (deep field) and blur effects. Blur type ¢ the list of types of available blur effects. Focus Near ¢ blur value for the nearest end of composition. Focus Far ¢ blur value for the far end of composition. Add Bright ¢ additional intensity for blurred layers. Some times it can be useful in complicated composition. | Layers Number ¢ the number of textual layers in composition. Perspective ¢ determines how textual layers are decreased in the distance. Fading ¢ how layers fade in the distance. Center of Perspective ¢ defines the point of perspective.
|
|
|
|
|
| | You can adjust it directly on preview area with help from by right clicking the mouse button. |
|
|
|
|
|
|
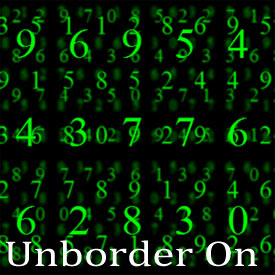
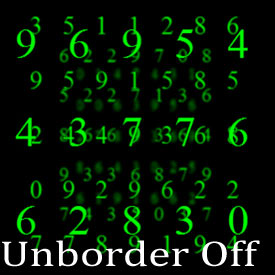
Layers Scatter ¢ setups distribution of colors for different layers. Layers Mix ¢ Āhow layers are blended into composition. Unborder ¢ in case of Grid pattern this check-box switches on or off what far layers have or have not square borders |
Special Tab This tab contains parameters which allow add different kinds of additional effects into textual composition, such us a glow or some random distributions of text attributes. |
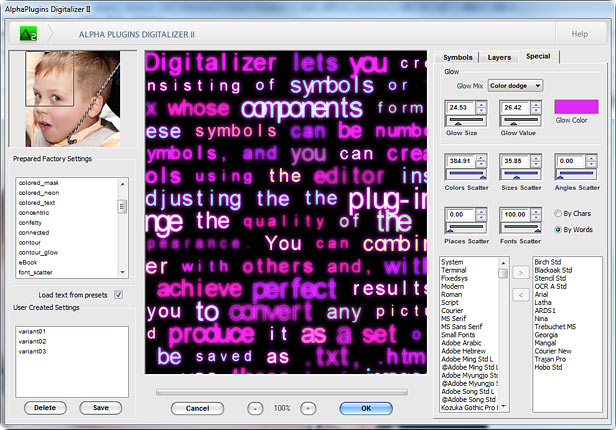
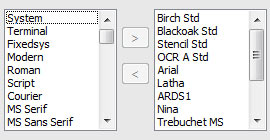
| Glow ¢ this group of parameters responses to the glow effect. If several layers are used then a glow will be added on each layer in composition. Of course, with decreasing glow sizes depends on perspective. Glow Size ¢ the size of glow. Glow Value ¢ the intensity of glow. Glow Color - as it is expected, it is a glow color. By Chars/By Words ¢ this radio buttons defines how random attributes will be applied: on each separated symbol or on each connected word. Colors Scatter, Sizes Scatter, Angles Scatter, Place Scatter ¢ defines random distribution of text attributes. The beginning value of random generator is set with the help of Random Seed slider on Symbols tab. Fonts Scatter ¢ lets you apply random fonts on text. For use this it needs to create a list of used fonts. Below there are two lists. The left contains all fonts available in system. The right should contain chosen fonts which will be used with the Fonts Scatter slider. You can add\delete fonts from left list to right with help of > and < buttons. |
| | | | |
| | |
| Conclusion | |
| |
The Digitalizer II is a cutting edge instrument for creating high-quality textual effects. This plug-in is indispensable in arsenal of any designer who wants to quickly and easily create an amazing professional look of art-production with minimal effort and in a short time. The Digitalizer II is a plug-in for Adobe Photoshop and compatibles. It is a true effects machine what lets you easily and quickly to create various textual and special effects. 
Visit the Digitalizer page on site
|
| | | | |
| | |
| System requirements | |
| |
Windows
- Windows OS 95-2000, XP(32/64Bit), Vista (32/64Bit), Windows 7, Windows 8, 10 or later
- 1.2 GHz processor or higher
- At least 256 megabytes of RAM or more
- Graphics card 16-bit color, and 256MB of VRAM or higher
- 1024 x 768 display or bigger
- Adobe Photoshop CS2 - CC2023 or later
|
| | | | |
Copyright, 2023, AlphaPlugins, LLC.
Author: Maxim Chernousov.
You can find more information about Digitalizer II plug-in. Please, visit Digitalizer's product page on our site. There you can find freshest version of this product. Also you can find tutorials and samples for our products. |
|
|